Create a recurring session
1. Click "Manage" and select "Add Recurring Sessions".
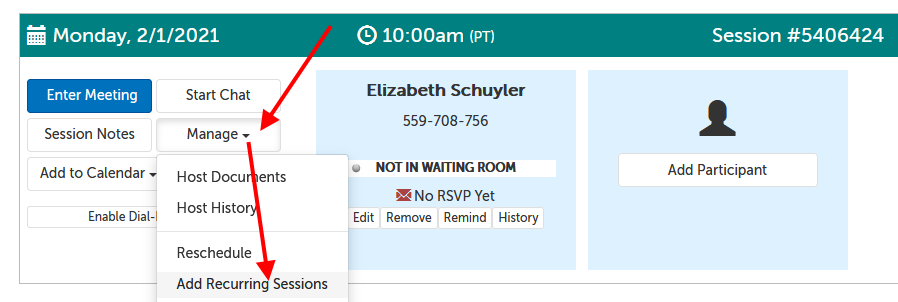
2. This will expand an area at the top of the session panel.
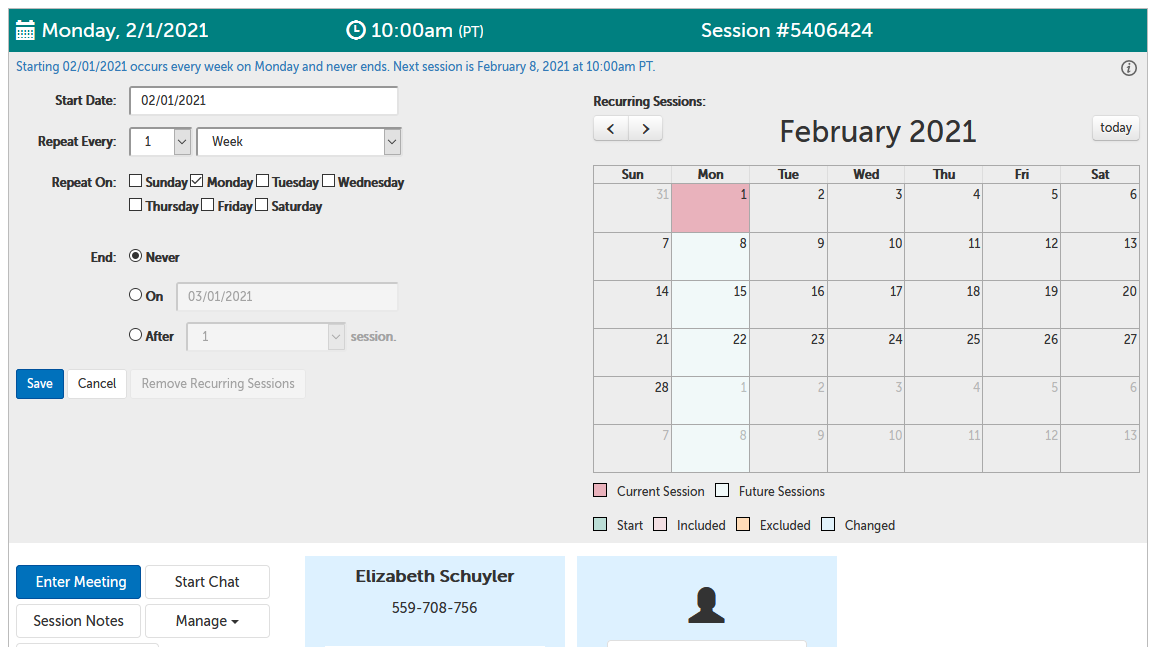
- Start Date: The default start date will be the date of the current session. This can be edited if you would like recurring schedule to use a different start date instead.
- Repeat every X [Day/Week/Month]: The default recurrence schedule will be weekly ("1 Week"), but you can edit this to select a different number, or use the unit "Day" or "Month".
- Repeat On: If "Week" is selected, then you can also select the specific days of the week. If "Month" is selected, you can specify which day of the month the recurring session should take place. (If "Day" is selected, then there is no "Repeat On" section.)
- End:
- Never: Have the meetings continue to recur with no set end date.
- On: No meetings after this date will be created on this recurrence schedule.
- After X sessions: Have the meeting recurrence schedule end after X sessions have been created through it. (This number INCLUDES the current session.)
3. After you have made your edits, click on the "Save" button to save your changes. (If you exit without saving, changes will be discarded.)
Edit a recurring session schedule
You can edit a recurring session schedule to determine when new sessions are created again.
1. Click the description of the recurrence schedule at the top of the session panel, OR click on "Manage" -> "Edit Recurring Sessions".
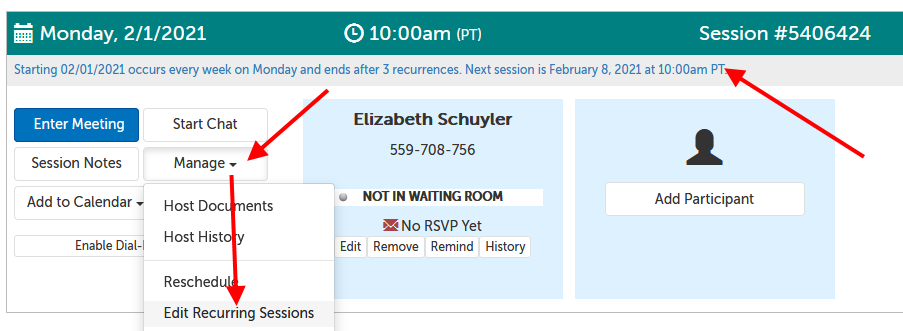
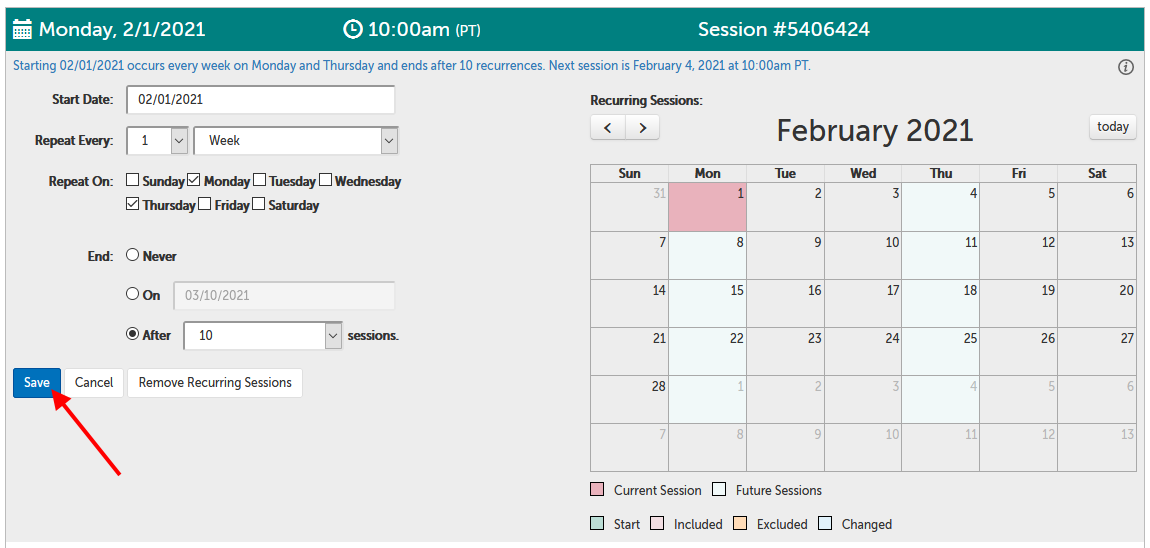
2. This will expand the Recurring Session panel, where you can edit any of the fields, and then click "Save"to save changes. This will save the changes and cause the Recurring Session panel to retract. (Click "Cancel" to cancel your edit, or click the description again to cause the panel to retract without saving any changes.)
- Edits will be reflected in the calendar to the right, but will only be saved if you click "Save".
Remove a recurring session schedule
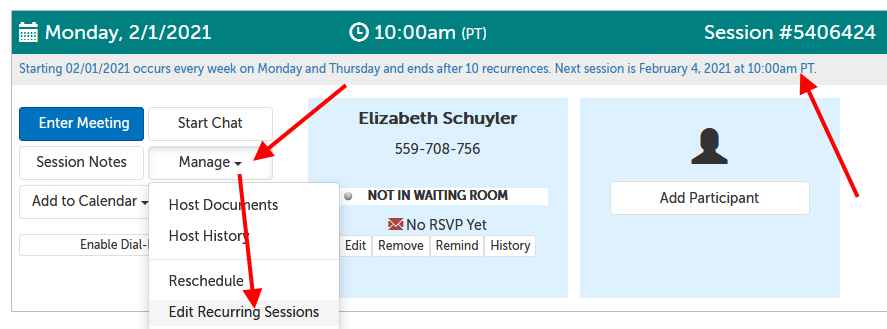
1. Click the description of the recurrence schedule at the top of the session panel, OR click on "Manage" -> "Edit Recurring Sessions".

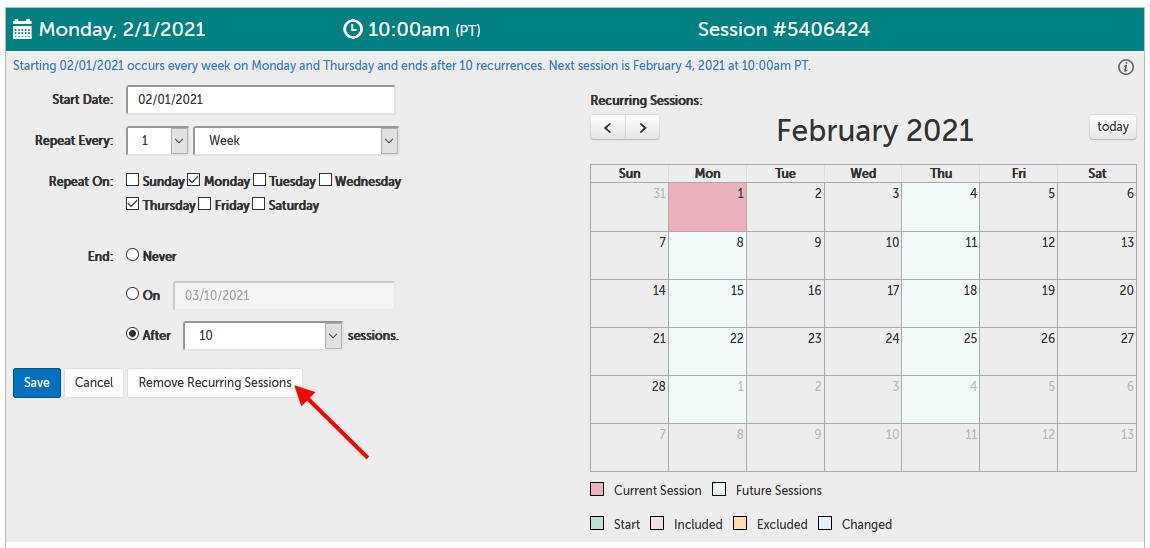
2. Click on the "Remove Recurring Sessions" button.
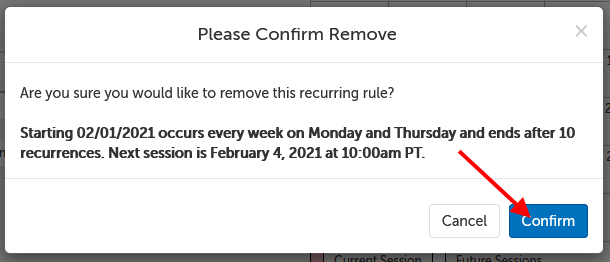
3. A confirmation pop-up will appear. Click the "Confirm" button to proceed with removing this recurring session.
Add an upcoming session to a recurring schedule
1. Click the description of the recurrence schedule at the top of the session panel, OR click on "Manage" -> "Edit Recurring Sessions".
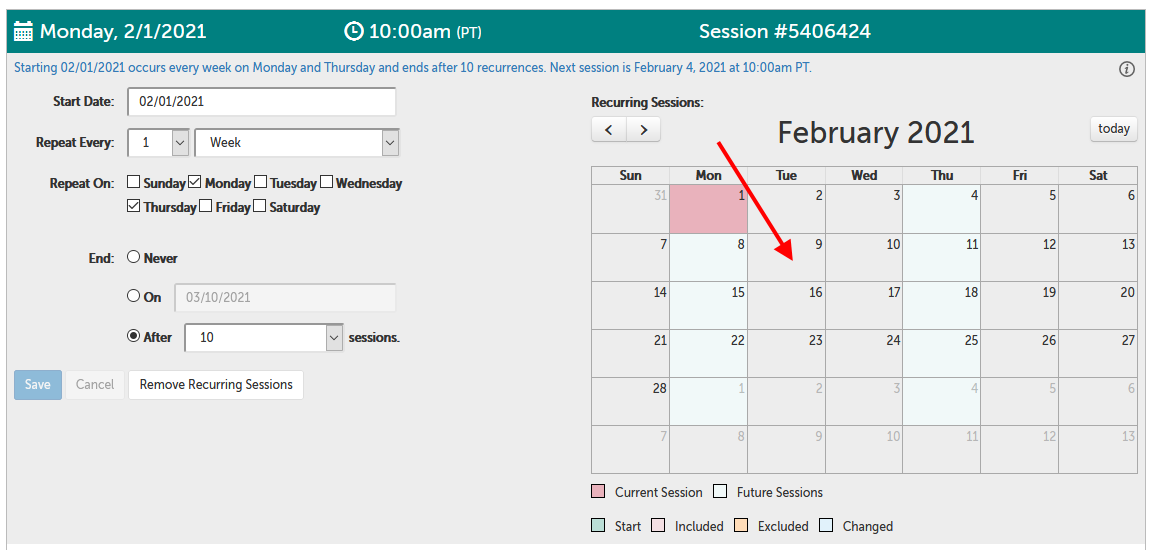
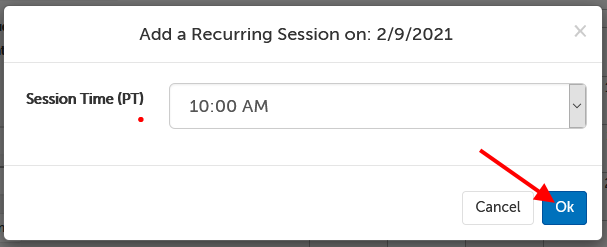
2. Tap any 'blank' (gray) square on the calendar on the right. (In this example, we've clicked on the square for February 9.)
3. A pop-up will appear with the time of the current session pre-filled, but with an option to edit the time selected. Click the "Ok" button once you have set the correct time.
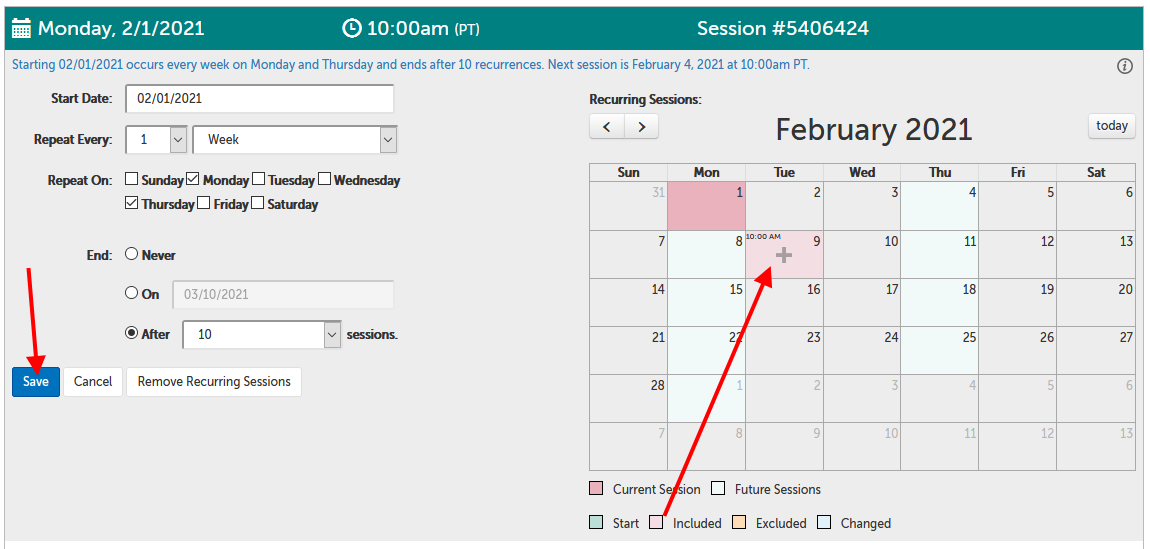
4. The square will fill with light pink and show the time of the added session, with a plus icon to indicate that a session has been added on this date, even though it falls outside of the usual recurrence schedule. Click on the "Save" button to save these changes. (If you exit without saving, changes will be discarded.)
Change the time for an upcoming session in a recurring schedule
1. Click the description of the recurrence schedule at the top of the session panel, OR click on "Manage" -> "Edit Recurring Sessions".

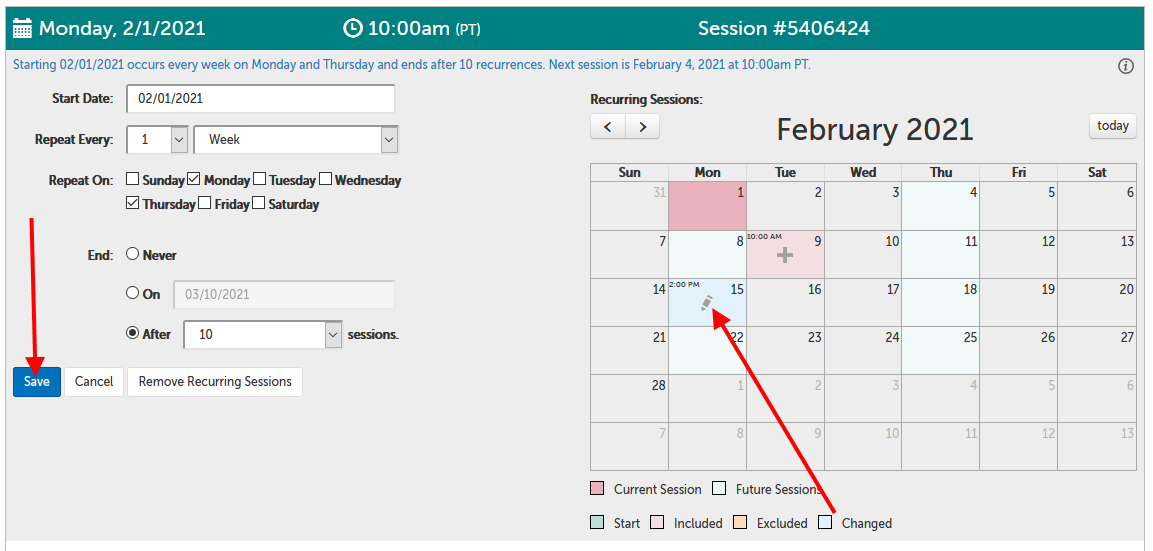
2. Click on the light green square (scheduled session) or light pink square (added session) for the session that you would like to edit. (In this example, we've clicked on the square for February 15.)
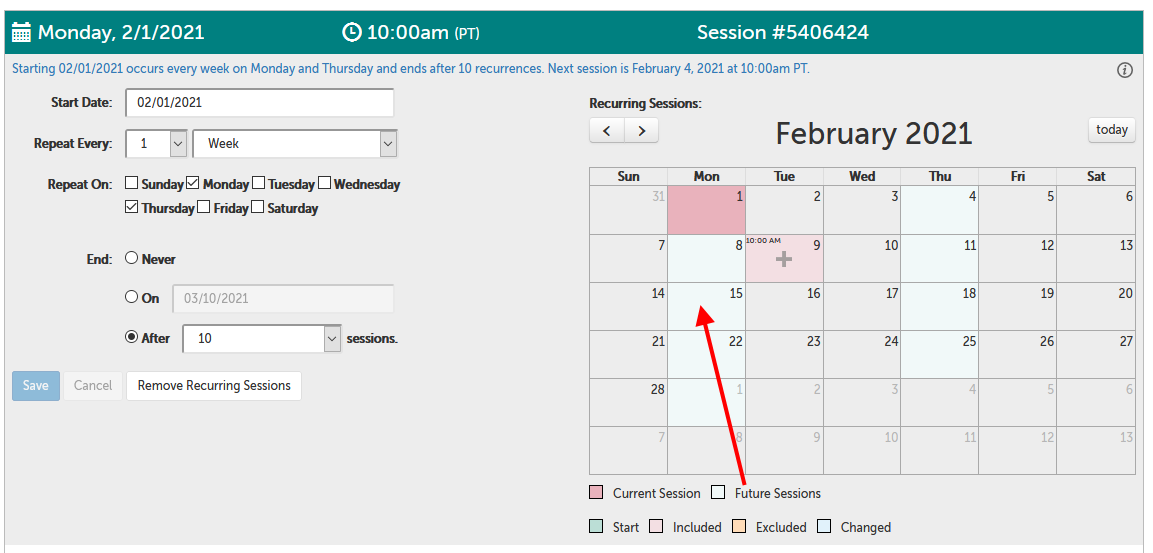
3. A pop-up will appear with the option to remove this recurrence, or change the time. Click the drop down to change the time of this selected session. Click the "Ok" button once you have set the correct time.
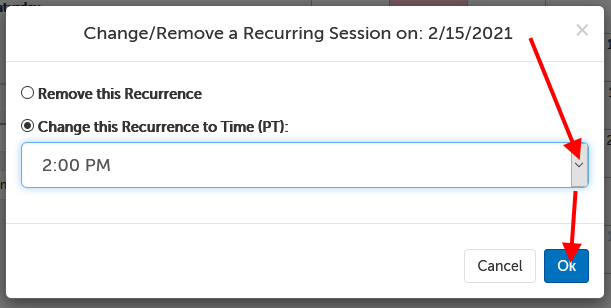
4. The changed session will have the new time stamp in the upper left hand corner of its square, and have a pencil icon on a light blue background.
The square will fill with light blue and show the time of the added session, with a pencil icon to indicate that a session time has been edited on this date. Click on the "Save" button to save these changes. (If you exit without saving, changes will be discarded.)
Delete an upcoming session from a recurring schedule
1. Click the description of the recurrence schedule at the top of the session panel, OR click on "Manage" -> "Edit Recurring Sessions".

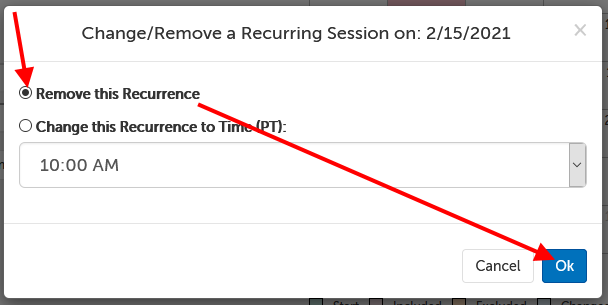
2. Click on the light green square (scheduled session), light pink square (added session), or light blue square (edited session) for the session that you would like to delete. (In this example, we've clicked on the square for February 15.)

3. A pop-up will appear with the option to remove this recurrence, or change the time. The default is "Remove this Recurrence", so you can click the "Ok" button to confirm removing it.
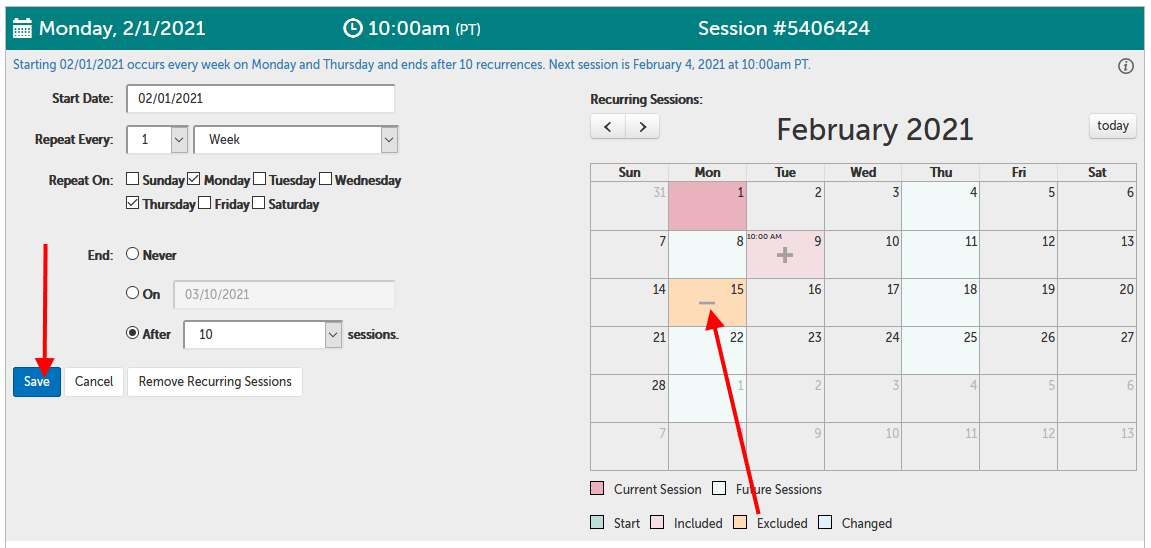
4. The changed session will a minus icon on a light orange background.
Click on the "Save" button to save this change. (If you exit without saving, changes will be discarded.)
Reschedule a current meeting that has a recurring schedule
Rescheduling the session that a recurrence schedule is based on, will also change the time used for future sessions.
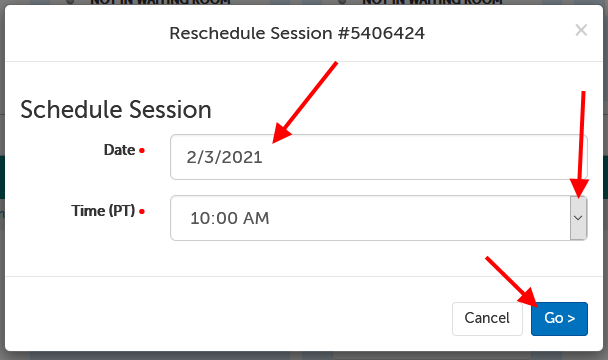
1. Click the "Manage" button and then select the "Reschedule" option.
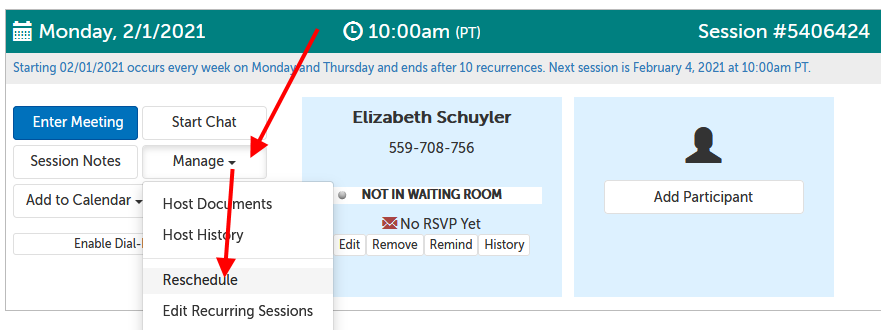
2. You can change the date and/or time and then click "Go". This will save and send a reschedule notice to participants. (Changing the date for the current session will not affect recurrence, but changing the time will affect the time at which future sessions.)
Cancel a current meeting while keeping the rest of the recurring schedule
1. Click the "Manage" button and then select the "Cancel" option.
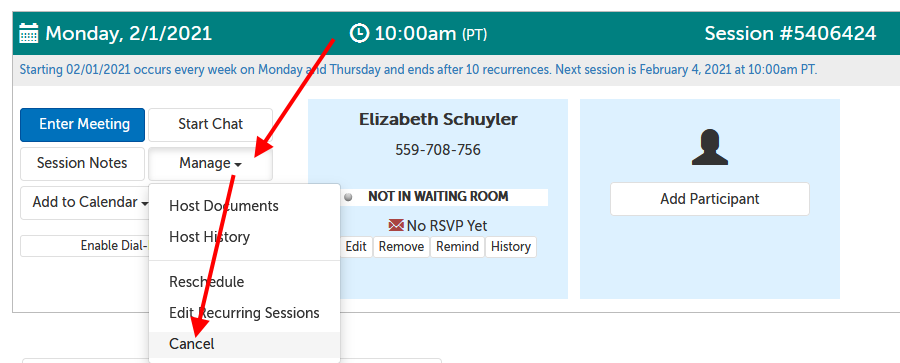
2. There will be two options:
-
Cancel only this session.
A cancellation notice will be sent out for this session, and then the system will create the next recurring session.
-
Cancel this and all recurring sessions.
A cancellation notice will be sent out for this session, and no other sessions will be created based on this session.
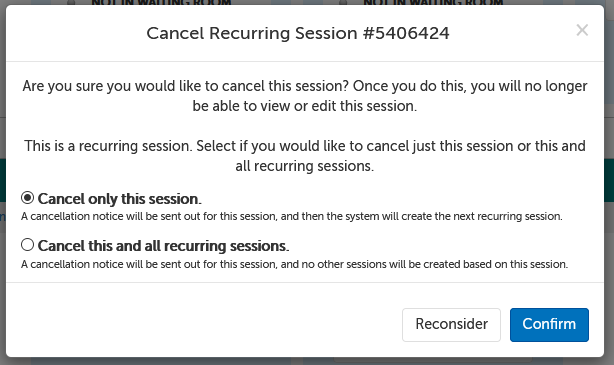
Select one option, and then click "Confirm".
This article was last reviewed by our Support team on January 17, 2021.